Learn How to
Get More People to Watch your Live Sale
 Your privacy is safe. We will never share your information. Privacy Policy

 Your privacy is safe. We will never share your information. Privacy Policy


Live Butler is an all-in-one social commerce solution designed to simplify the way businesses sell their products digitally. From accepting orders, and updating inventory to sending invoices, Live Butler will do it for you.
Live Butler will assist retailers during their live sales on Facebook. We will automatically accept your customer's orders for you and will instantly send them invoices through Messenger.
Watch here how you can use Live Butler in Live Selling.
Live Butler is not limited to Live Selling. You can also sell your products through a Facebook Post with Live Butler.
Comment selling enables shoppers to purchase from posts and live sales on social media with a simple comment. When a shopper made a comment purchase to claim an item, they are automatically accepted.
Live Butler will update your inventory in real-time to avoid selling products that are already out of stock.
Live Butler will provide you with an E-commerce store where you can sell your products online. It is already pre-built so you don't have to worry about the design and development.
Watch here how you can use Live Butler to start your own E-commerce store.
In Live Butler, we believe that every business should be given the opportunity to grow more and that's why we offer our product for FREE! No credit card is needed and you can access it for a lifetime.
We also offer premium plans with extra features that will make Live Butler a better tool for your social selling. You can check here all our exciting plans.
When you first create an account with Live Butler, you will be asked to log in to your Facebook account and link your Facebook Page.
Choose the Pages you want to link with Live Butler and then click next.

Watch here how you can set up your account.
If you are using a paid account, you can link one or more Facebook pages to your Live Butler account. You can switch from all your pages by clicking 'switch page'

And then choose the Facebook page you to switch to.

Create a campaign by going to the Campaign Page and clicking the 'Add Campaign' button.

In the Basic Information section, you will be asked if it's for a live sale or not. Choose yes, and then add your campaign description.

Watch here how you can configure the basic information.
Set the start and end time of the live sale, as well as the reservation deadline and offer ends.

Watch here how you can configure the live sale date and time.
Add the products that you will sell on your live sale.

And then save your changes.
Watch here how you can add products to the campaign.
After you have configured your live sale campaign, you can post it on your Facebook. For a live sale campaign, the post will serve as an announcement to your customers that you will be having a live sale. You can either click 'Save and Publish'

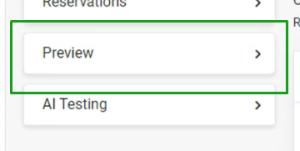
or go to preview

Edit the content of the post

and then click 'Publish'

Watch here how to publish your campaign.
Go to your Facebook Page and go live!

All of the live sales you made between the set start and end date and time will be recorded in that campaign. And all the reservations made in that live will be accepted by Live Butler!
Create a campaign by going to the Campaign Page and clicking the 'Add Campaign' button.

In the Basic Information section, you will be asked if it's for a live sale or not. Choose no, and then add your campaign description.

Watch here how to publish your campaign.
Set the reservation deadline and offer ends.

Watch here how to configure the post sale date and time.
Add the products that you will sell on your live sale.

And then save your changes.
Watch here how you can add products to the campaign.
After you have configured your post-sale campaign, you can now publish it on your Facebook page.
You can either click 'Save and Publish'

or go to preview where you can publish the campaign.

Edit the content of the post

and then click 'Publish'

Watch here how you can publish your campaign.
All the reservations made by your customers in that Facebook post will be accepted by Live Butler.
There are two types of default replies you can set, comment replies and messenger replies.
Comment replies are the reply that your customers will get in the comment section and Messenger replies are the message they will get in their Messenger once they made a comment purchase.
To set the default replies, go to Settings -> Default Replies
Set the default comment reply

Watch here how you can configure the comment reply in global settings.
Set the default message reply

Watch here how you can configure the messenger reply in the global settings.
You can also set the default reply for a specific campaign only. You can do it by Editing your campaign and going to Default Replies.

Watch here how you can configure the comment and messenger reply inside the campaign.
The reservation keyword is the word your customers will put in their comment purchase to make a reservation. To change it, go to Settings > Campaign Settings. Then change the reservation keyword.

Watch here how you can configure the reservation keyword.
There are two ways you can add products in Live Butler. One is by going to Products and then clicking the 'Create Product' button.

Watch here how you can add products in the product page.
The second is by going to Edit Campaign > Product and Options and then clicking the 'Create Product' button.

Watch here how you can add products to the campaign.
To add the products you will sell on your live sale, go to Edit Campaign > Product and Options
Put a checkmark on the products you want to add, and then click the 'Add Selected Products' button.

Watch here how you can add products to the campaign.
On the Customer Service page, you will be able to see all the messages from your customers such as complaints, inquiries, or requests. You will be able to reply to them on this page and keep track of the conversation.

Click here to watch how.
You can add your shop vouchers on your shop back end. Go to Catalog > Cart Rules
To add a new one, click this 'Add new cart rule' or the plus sign button.

Click here to watch how to create your shop vouchers.
When you sign up with Live Butler, you will be asked to put your shop name, which will also serve as your domain name. Although you can change your shop name later, you won't be able to change your shop's domain name.

The Best Customers report allows you to view customers who ordered and spent the most with your business. You can use this list if ever you want to reward them for their loyalty to your business or to create lookalike audiences for ad targeting.
View the Best Customers report by going to Dashboard > Best Customers

Click here to watch how to configure the best customers report.
The Best Selling report provides a list of each of your best-selling products. In the list, you will see the product name, how many of that item was sold, and the total price.
To see the best-selling products, go to Dashboard, and below the page, you will see the list of your best-selling products.

We at Live Butler want to give you the best experience while using our system. Your feedback would be very helpful to make Live Butler better.
Look for this icon on the lower right side of your screen
![]()
Choose 'Feedback' for the topic and then tell us what you think about our system.

Our customer support is only available for paid plans.
However, we provide FREE Personal Customer Support for 3 months to our first 200 clients.


